Connecting a Target Board 타겟 보드 연결하기
다음은 타겟 보드 "nRF52 DK"를 사용하는 경우에 대한 설명이다.
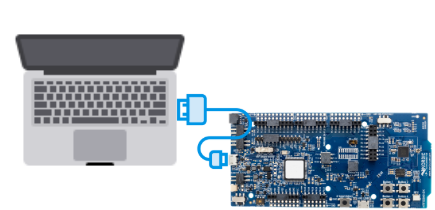
1. 다음 그림과 같이 호스트 컴퓨터와 타겟 보드를 USB 케이블로 연결한다.
타겟 보드 "nRF52 DK"는 JTAG 디버거 "J-Link OB"와 USB to UART 변환 장치를 내장하고 있어서, 이 연결만으로 JTAG 디버거와 UART 통신 기능을 사용할 수 있다.
2. 호스트 컴퓨터에서 "J-Link GDB Server"를 실행한 다음, 다음과 같이 설정하고 "OK" 버튼을 누른다.
- Connection to J-Link:
- USB
- Target device:
- nRF52832_xxAA
- Little Endian
- Target interface:
- SWD
- Speed:
- Auto Selection
3. 호스트 컴퓨터에서 UART 통신 프로그램을 실행한 다음, 다음과 같이 설정하고 UART 포트를 연다.
- UART port:
- <JLink CDC UART Port Name>
- Baud rate:
- 115200
- Data size:
- 8
- Parity:
- None
- Stop bits:
- 1
- Flow control:
- None
"JLink CDC UART Port Name"은 호스트 컴퓨터가 윈도우인 경우 "장치 관리자" > "포트 (COM & LPT)"에서 확인할 수 있다.
호스트 컴퓨터가 리눅스인 경우는 "/dev/ttyACM...", 맥오에스인 경우는 "/dev/tty.usbmodem..."이다.
